

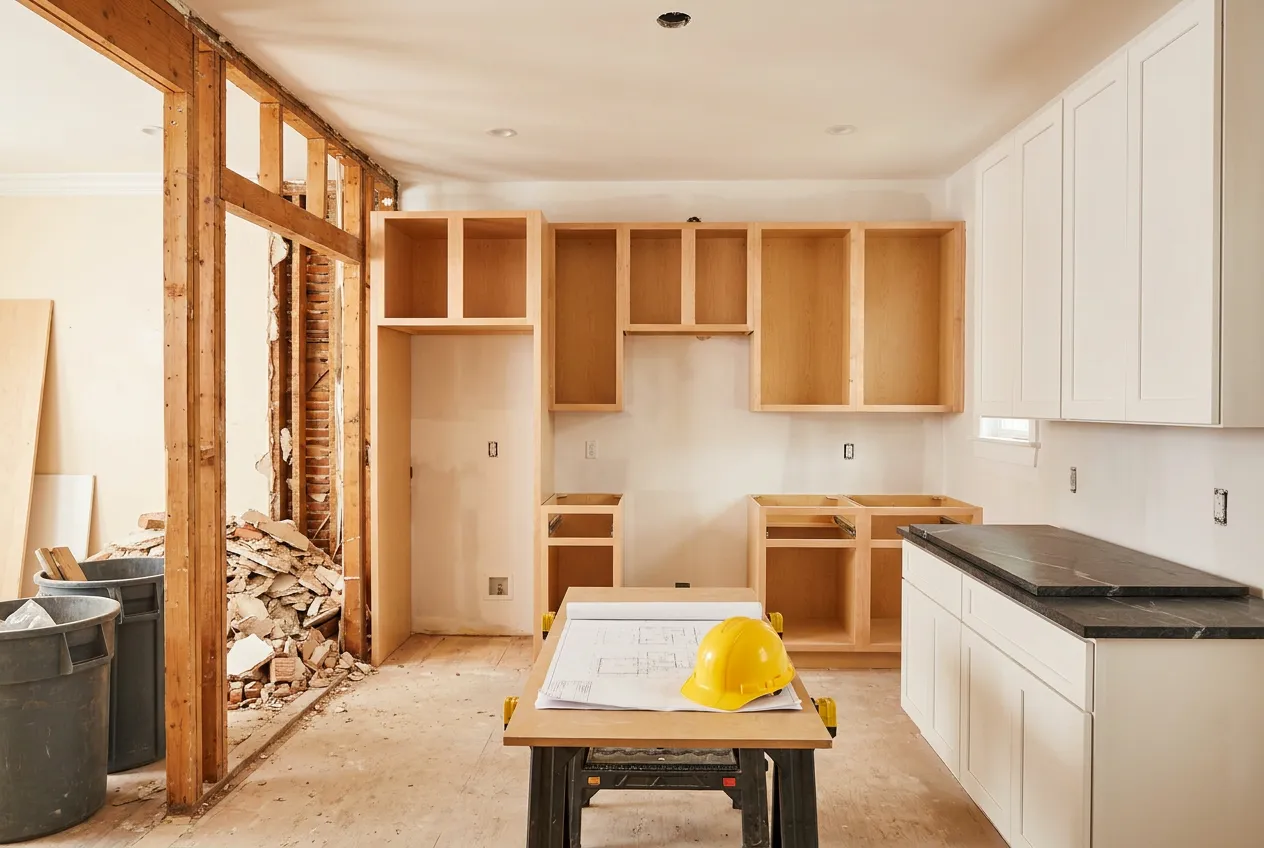
You’ve chosen your designer, signed your contract, and selected every material down to the cabinet handles. The design phase is done. But what actually happens once the demolition crew arrives? For most homeowners, the physical construction period remains something of a mystery—a black box between “signing the contract” and “revealing the finished kitchen.”
Understanding what genuinely happens week by week during your renovation build serves two purposes. It sets realistic expectations, reducing the anxiety that comes from not knowing whether progress is normal or concerning. And it helps you plan your household’s daily life around each stage, from when you’ll lose water access to when you can expect to cook again.
This guide walks through a typical 6-8 week Kapiti Coast kitchen renovation, stage by stage, based on what actually happens during hundreds of local projects. Timelines vary based on project scope, but this framework gives you a genuine, practical understanding of your renovation journey once construction begins.
Key Takeaways
- Most kitchen renovations take 6-8 weeks from demolition to completion, though scope, consent requirements, and material lead times all affect actual duration
- Demolition typically takes 2-4 days, though this brief, dramatic stage often creates the misleading impression the whole project moves this quickly
- Rough-in trade work (plumbing, electrical) follows demolition and represents one of the most important but least visually exciting stages
- Cabinetry installation usually spans 3-5 days and marks the point where your kitchen starts genuinely looking like a kitchen again
- Benchtop templating happens after cabinets are installed, not before, adding 1-2 weeks for fabrication before final installation
- Splashback, appliance integration, and finishing details typically occupy the final 1-2 weeks before handover
- Living without a kitchen for the full renovation period is normal, and setting up a temporary kitchen area early significantly reduces daily disruption
- A final walkthrough and snag list process should always occur before final payment, ensuring any outstanding details receive proper attention
Before Construction Begins: What Should Already Be Sorted
Before your contractor’s first day on site, several things should already be confirmed. Materials should be ordered (particularly custom cabinetry and benchtops requiring lead time), any required building consent should be approved, and your temporary kitchen arrangements should be ready.
If you haven’t yet worked through this preparation phase, our Spring Kitchen Renovation Checklist covers everything that happens before construction starts in detail.

Week 1: Demolition and Strip-Out
Days 1-2: Protection and Removal
Your contractor’s first task involves protecting adjacent areas—laying protective flooring in hallways and connecting rooms, sealing doorways to limit dust spread, and setting up any required temporary barriers. Once protection is in place, demolition begins: removing existing cabinetry, benchtops, splashback, and flooring if included in your scope.
This stage moves quickly and can feel dramatic, particularly in character villa kitchens where original materials sometimes prove more stubborn to remove than anticipated. Don’t be alarmed by the mess during this phase—it’s temporary and necessary.
Days 3-4: Assessment and Preparation
Once your kitchen is stripped back to its bones, your contractor assesses the space against original plans. This is when any hidden issues—damaged framing, outdated wiring, unexpected plumbing configurations, or moisture damage behind old cabinetry—come to light. Character villas particularly tend to reveal surprises at this stage, which is exactly why we recommend building 10-15% contingency into your budget.
If issues are discovered, your contractor should communicate promptly, explaining what’s been found and how it affects timeline or cost before proceeding.
Week 2: Rough-In Trade Work
Electrical Rough-In
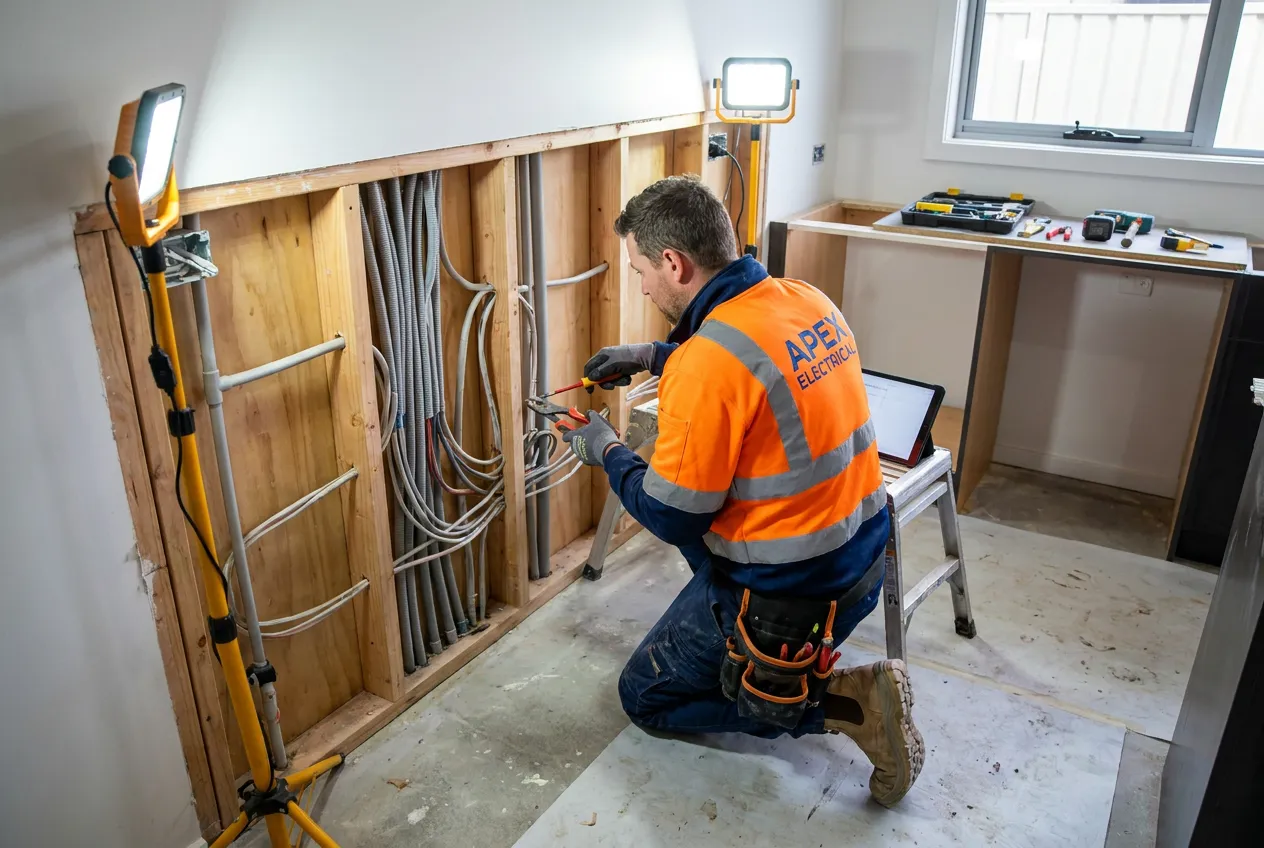
Your electrician installs or relocates wiring for new lighting positions, additional power points, appliance circuits, and any under-cabinet or feature lighting specified in your design. This work happens before wall linings or cabinetry go in, as it typically requires access through open wall cavities.
Plumbing Rough-In
Your plumber relocates or installs pipework for sink positions, dishwasher connections, and any changes to water supply or drainage. If your renovation maintains your existing kitchen footprint without moving major fixtures, this stage moves relatively quickly. Layout changes involving new sink or appliance positions require more extensive work.
Why This Stage Matters More Than It Looks
Rough-in work isn’t visually dramatic—there’s no immediate transformation to photograph—but it’s arguably the most important stage of your entire renovation. Mistakes or oversights here become expensive and disruptive to correct once walls are closed and cabinetry installed. This is also typically when any required inspections (if your project needs consent) occur, so factor potential inspection scheduling into your timeline expectations.
Week 3: Wall Preparation and Flooring
Wall Linings and Preparation
If your renovation involves any wall alterations, patching, or new linings following rough-in work, this happens now. Walls are prepared, patched, and finished ready for painting or tiling, with adequate drying time factored in before subsequent stages.
Flooring Installation
If your project includes new flooring, this typically installs before cabinetry, providing a clean, level base for cabinet installation. Vinyl plank flooring usually takes 2-3 days including preparation, whilst tile flooring may extend slightly longer given adhesive curing time requirements.
Painting (If Applicable)
Any wall painting separate from cabinetry finishes typically happens during this stage, before cabinets arrive to avoid painting around installed joinery.

Week 4: Cabinetry Installation
This is the stage most homeowners eagerly anticipate—when the kitchen genuinely starts looking like a kitchen again.
Cabinet Delivery and Placement
Custom or semi-custom cabinetry arrives on site (assuming it was ordered promptly after design finalisation, allowing the typical 3-6 week fabrication lead time). Installers begin with base cabinets, ensuring proper levelling and secure fixing, before moving to upper cabinets and any tall pantry units.
Installation Sequence
Quality installers work methodically: base cabinets first (establishing the foundation line), then upper cabinets (fixed securely to wall framing), then any island or peninsula units. Doors and drawer fronts are typically fitted last, protecting them from damage during the more physical installation stages.
What to Expect
This stage typically takes 3-5 days depending on kitchen size and complexity. You’ll see daily visible progress, which many homeowners find genuinely exciting after the less visually dramatic rough-in weeks. Minor adjustments—door alignment, drawer runner adjustments—are normal and expected as part of quality installation, not signs of problems.
Week 5: Benchtop Templating and Fabrication
Why Templating Happens Now, Not Earlier
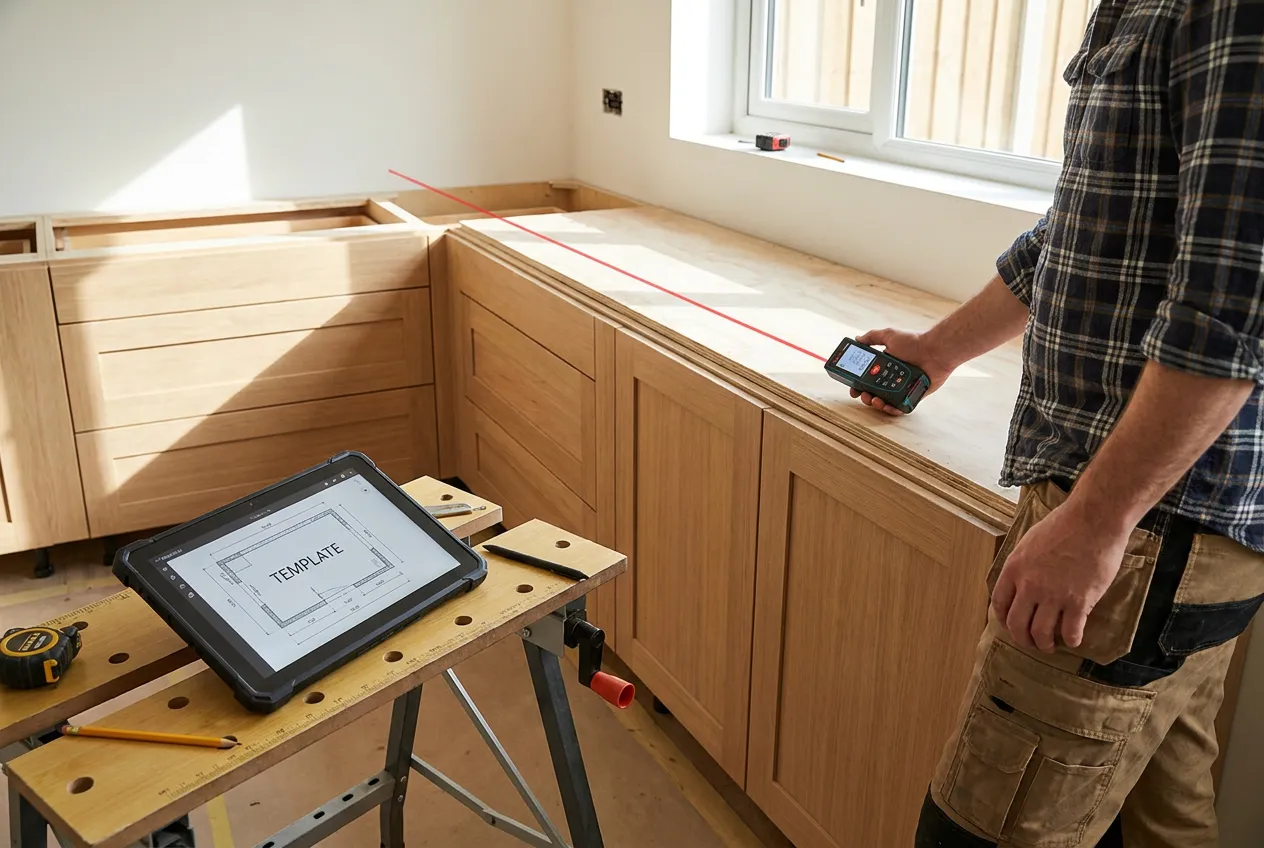
Benchtop templating—precisely measuring your installed cabinetry to create exact cutting specifications—happens only after cabinets are fully installed and level. Templating before cabinet installation risks inaccuracies if cabinet positions shift even slightly during installation.
The Templating Process
Your benchtop fabricator visits site, typically using laser measuring technology to create precise digital templates accounting for every corner, cutout, and edge detail. This visit usually takes 1-2 hours for a standard kitchen.
Fabrication Lead Time
Following templating, fabrication typically takes 1-2 weeks depending on material (porcelain and engineered stone generally require professional cutting and edge-polishing time) and your fabricator’s current workload. This represents a natural pause in visible on-site progress, though your kitchen continues functioning without a benchtop during this period—a detail worth planning around for your temporary kitchen arrangements.
For detailed comparison of benchtop materials and their respective fabrication considerations, see our guide to comparing porcelain, engineered stone, and laminate benchtops.
Week 6: Benchtop Installation and Splashback
Benchtop Installation
Once fabricated, your benchtop installs in a single day for most kitchens, though large or complex layouts with waterfall edges or extensive cutouts may take slightly longer. This is a genuinely satisfying milestone—your kitchen’s largest continuous surface finally complete.
Splashback Installation
Following benchtop installation, splashback work begins. Tiled splashbacks typically take 2-3 days including grouting and curing time. Glass or acrylic splashbacks, cut to precise specifications, often install more quickly—sometimes within a single day—though templating and fabrication lead time similarly applies if using matching benchtop material for a seamless look.
Week 7: Appliance Integration and Finishing Details
Appliance Installation
Ovens, cooktops, rangehoods, dishwashers, and any integrated refrigeration are installed and connected. Gas appliances require registered gas fitters for connection, whilst electrical appliances need appropriate certified connection to previously installed circuits.
Hardware Installation
Cabinet handles, knobs, and any remaining hardware details are fitted. This seemingly minor stage significantly impacts your kitchen’s finished appearance, as hardware represents some of the most visible daily-touch details.
Lighting Fixtures
Pendant lights, under-cabinet LED strips, and any decorative lighting elements are installed and connected, with electrical certification confirming safe, compliant installation.
Final Plumbing Connections
Sink, tapware, and dishwasher connections are finalised, with your plumber testing all connections for proper function and checking for leaks before considering this stage complete.

Week 8: Final Details and Handover
Final Inspections
If your project required building consent, final inspection typically occurs during this stage, with your certifier confirming all work meets code requirements before issuing final certification.
Deep Clean
Professional or thorough cleaning removes construction dust and debris, preparing your kitchen for actual use. This includes cleaning inside cabinets and drawers, wiping down all surfaces, and ensuring appliances are genuinely ready for cooking.
The Final Walkthrough
Before final payment, walk through your completed kitchen carefully with your contractor. Test every drawer, door, and appliance. Check that all specified details match what was agreed—correct hardware, proper cabinet alignment, appropriate finish quality throughout.
Creating and Resolving the Snag List
Document any items requiring adjustment or correction—perhaps a slightly misaligned door, a small paint touch-up needed, or a minor gap requiring sealant. Reputable contractors address reasonable snag list items as standard practice before considering the project complete. Don’t feel pressured to make final payment before genuine concerns are resolved.
Warranty Documentation
Collect warranty information for cabinetry, appliances, benchtops, and any other warranted elements, storing this together with your contract and final invoice for future reference.
Factors That Extend This Timeline
Whilst 6-8 weeks represents a typical timeline, several factors commonly extend this timeframe, and understanding them helps set realistic expectations for your specific project.
Character Home Surprises
Villa and cottage renovations frequently reveal unexpected issues once walls open—outdated wiring requiring full upgrade, moisture damage behind old cabinetry, or structural quirks requiring adjusted plans. Building this possibility into your expectations (and your contingency budget) prevents unnecessary stress if it occurs.
Consent and Inspection Scheduling
Projects requiring building consent add inspection scheduling into the timeline at various stages (particularly after rough-in work and at final completion). Council inspection availability affects how quickly these can be scheduled, occasionally adding several days of waiting time.
Custom Material Lead Times
If custom cabinetry, imported fixtures, or specialty benchtop materials weren’t ordered promptly after design finalisation, waiting for these items to arrive can extend your overall timeline beyond the standard framework outlined here.
Seasonal Timing
Renovations during summer’s peak season sometimes experience minor delays from contractor scheduling across multiple simultaneous projects. Our guide to winter renovation timing explores how off-peak scheduling often delivers faster, more focused project timelines.
Scope Changes Mid-Project
Deciding to add or change elements once construction has begun—however tempting when you can finally see the space taking shape—almost always extends your timeline and budget. Finalising decisions during the design phase, before construction begins, keeps projects moving efficiently.
Living Without a Kitchen: Practical Tips
Managing daily life during your renovation’s 6-8 week timeline requires some practical preparation.
Set Up Early
Establish your temporary kitchen arrangement before demolition begins, not after. A microwave, electric kettle, toaster, and small bar fridge in another room maintains basic meal preparation capability throughout the process.
Plan for the Benchtop Gap
Remember that weeks 5-6 typically involve functioning without a benchtop whilst fabrication occurs, even though cabinets are installed. Plan simplified meals during this specific window.
Communicate with Your Household
Ensure everyone in your household understands the rough timeline and what to expect at each stage, reducing frustration when the process inevitably feels slower than the exciting “after” photos suggested it would.
Stay Flexible on Dining
Many families find this period suits more takeaway meals, barbecue cooking, or simplified home-cooked options than usual. Embracing this temporary adjustment, rather than fighting it, generally reduces stress throughout the renovation period.

Conclusion
Understanding what genuinely happens during your kitchen renovation—week by week, from demolition through final handover—transforms an anxiety-inducing unknown into a manageable, even exciting process. Whilst every project varies slightly based on scope and unexpected discoveries, the general framework outlined here reflects what actually happens during most Kapiti Coast kitchen renovations.
The key insight many homeowners find valuable: visible progress isn’t constant throughout the process. Dramatic demolition gives way to less visually exciting but critically important rough-in work, followed by the genuinely satisfying cabinetry and benchtop stages, before finishing details bring everything together. Understanding this rhythm helps you recognise normal progress rather than worrying unnecessarily during quieter stages.
At Chatswood Kitchens, we maintain clear communication throughout every stage of your renovation, ensuring you always understand what’s happening and what comes next. Our four decades of Kapiti Coast experience means we’ve refined this process extensively, helping families navigate their renovation journey with confidence rather than uncertainty.
Ready to begin your own renovation journey? Understanding the process ahead is the first step toward approaching it with genuine excitement rather than apprehension.
Frequently Asked Questions
How long does a typical kitchen renovation take from start to finish?
Most Kapiti Coast kitchen renovations take 6-8 weeks from demolition through final handover, though this varies based on project scope and any unexpected discoveries. This timeline breaks down roughly as: 1 week for demolition and initial assessment, 1 week for electrical and plumbing rough-in, 1 week for wall preparation and flooring, 1 week for cabinetry installation, 1-2 weeks for benchtop templating and fabrication, and 1-2 weeks for splashback, appliance integration, and finishing details. Character villa renovations sometimes extend beyond this range due to hidden issues discovered once walls open, whilst simpler cosmetic updates without structural changes may complete somewhat faster. Renovations requiring building consent should also factor in inspection scheduling time at various stages.
Why does my kitchen sit without a benchtop for a week or two during renovation?
Benchtop templating—precisely measuring your installed cabinetry to create exact cutting specifications—can only happen after cabinets are fully installed and level, not before. Templating too early risks inaccuracies if cabinet positions shift slightly during installation. Following templating, fabrication typically takes 1-2 weeks depending on your chosen material, as porcelain and engineered stone both require professional cutting and edge-polishing processes that can’t be rushed without compromising quality. This means your kitchen will have installed cabinetry but no benchtop for a period, which is completely normal rather than a sign of delay or problems. Planning your temporary kitchen arrangements around this specific gap helps manage this period smoothly.
What’s the most common cause of kitchen renovation delays?
Character home surprises rank among the most common causes of delay, particularly in Kapiti Coast’s abundant villa and cottage stock. Once walls open during demolition and rough-in stages, previously hidden issues—outdated wiring requiring upgrade, moisture damage behind old cabinetry, or unexpected structural details—sometimes require adjusted plans or additional work before proceeding. Beyond this, mid-project scope changes (deciding to add or alter elements once construction has begun) frequently extend timelines, as do delays in ordering custom materials promptly after design finalisation. Building 10-15% contingency into both your budget and your timeline expectations, particularly for older properties, helps manage these common causes of delay without unnecessary stress if they occur.
What should happen during the final walkthrough before I make final payment?
Before final payment, you should walk through your completed kitchen carefully with your contractor, testing every drawer, door, and appliance to confirm proper function. Check that all specified details match what was agreed in your contract—correct hardware finishes, proper cabinet alignment, appropriate paint and finish quality throughout, and confirmation that all included elements have been completed. Document any items requiring adjustment or correction as a formal snag list, whether that’s a slightly misaligned door, a paint touch-up, or a minor gap requiring sealant. Reputable contractors address reasonable snag list items as standard practice before the project is considered complete. You shouldn’t feel pressured to make final payment before genuine concerns raised during this walkthrough have been properly resolved.
Can I still use my kitchen at all during the 6-8 week renovation period?
Generally no, not in any meaningful way, particularly from demolition through cabinetry and benchtop installation. Most homeowners establish a temporary kitchen setup in another room—typically involving a microwave, electric kettle, toaster, and small bar fridge—to maintain basic meal preparation capability throughout the process. This temporary arrangement should be established before demolition begins rather than improvised afterward. Some renovations affecting only part of the kitchen, or staged approaches tackling sections sequentially, might maintain partial functionality, though this depends entirely on your specific project scope and layout. Discuss realistic expectations for kitchen access with your contractor during planning, as this significantly affects how you’ll manage daily life throughout the renovation period.
Ready to Understand Your Own Renovation Timeline?
Whether you’re still in the planning stages or ready to book your renovation, Chatswood Kitchens provides clear, honest communication throughout every stage of your project.
Our complimentary consultations involve a realistic timeline specific to your renovation’s scope, clear explanation of what to expect at each construction stage, honest discussion of factors that might affect your specific project’s timeline, and ongoing communication throughout construction so you’re never left wondering what’s happening next. We offer professional services across every budget level, from targeted updates through complete custom kitchen transformations.
Contact Chatswood Kitchens today to discuss your renovation timeline. Call us directly at 04 902 9292 or email enquiries@chatswoodkitchens.co.nz to schedule your consultation. Visit our Paraparaumu design studio at 46 Te Roto Drive, Paraparaumu 5032 to start planning your kitchen’s transformation with confidence.
Understanding the journey ahead is the first step—let’s walk through it together.